Table of Contents
Shine Bright After Hours: Everything About Glow Challenge Coins
If you’re a challenge coin collector, military veteran, business owner, or fan of unique memorabilia, you’ve likely stumbled across glow-in-the-dark challenge coins and wondered, “What makes these so special?” I know I did. A few years ago, my first glow challenge coin— a small military-style piece—barely caught my eye in daylight… until I turned off the lights. Its soft, otherworldly glow hooked me instantly. Since then, I’ve learned everything about these luminous tokens: how they’re made, why they’re beloved, how to design one that stands out, and how to keep their glow lasting. This isn’t just a guide—it’s a deep dive into the magic behind their nighttime shine, the craft that goes into them, and why they’re more than metal pieces—they’re memories that glow long after the day ends.
First Things : What Exactly Is a Glow-in-the-Dark Challenge Coin?
Let’s start with the basics. Even if you know challenge coins, the glow-in-the-dark variety has unique differences. A standard challenge coin is a small metal token (1.5 to 2 inches in diameter) representing a group, event, or achievement—think military units, fire departments, or corporate teams. They’re meant to be carried, traded, and displayed as a symbol of pride and camaraderie.
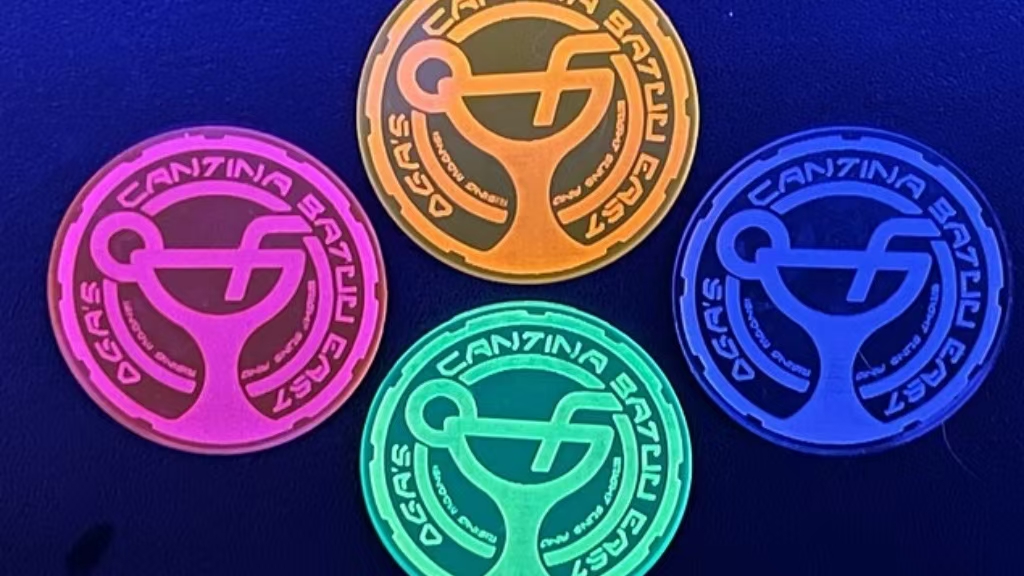
A glow-in-the-dark challenge coin adds a luminous twist: embedded with special materials that absorb light (natural or artificial) and emit a soft glow at night—no batteries needed. The glow ranges from subtle blue/green to bold hues, depending on materials and design. Not all are equal, though: some fade fast, others shine bright for hours. After testing dozens, the best feel like holding a tiny piece of starlight.
The History of Glow Challenge Coins: From Military Roots to Modern Collectibles
Challenge coins have a rich history dating to World War I. The legend goes: a wealthy lieutenant gave his troops bronze medallions with the unit’s insignia. One soldier, captured by Germans, escaped to a French outpost but was mistaken for a spy. Just before execution, he pulled out his coin; the French recognized the insignia and spared him. From there, challenge coins became a military staple for morale, recognition, and camaraderie.
Glow-in-the-dark challenge coins are a modern addition, growing popular in the 2000s as manufacturing and luminous materials improved. Initially used by military units in low-light environments (night patrols, overseas missions) as subtle identifiers or morale boosts, they’ve since expanded beyond the military—corporations use them for recognition, event organizers for souvenirs, and collectors for their unique look. Today, they’re one of the fastest-growing segments of the challenge coin market.
What Makes Glow Challenge Coins Different From Regular Challenge Coins?
At first glance, glow challenge coins look like regular ones—same metal base, engravings, size, and shape. But the differences lie in the details (and the glow). Here’s what sets them apart:
First, materials. Regular coins use brass, zinc, or copper with finishes like nickel or gold. Glow coins use the same base but add a luminous powder—usually phosphorescent (like strontium aluminate, which absorbs light and emits it slowly) or fluorescent (brighter but needs black light). High-quality glow coins use phosphorescent materials for longer, black-light-free glow.
Second, design. Glow coins often have designs tailored to highlight the glow—e.g., a logo filled with luminous material that pops in the dark, or a subtle full-surface glow. The best designs balance daytime appeal with nighttime impact, using glow to highlight messages or contrast with the metal.
Third, purpose. While regular coins focus on recognition and camaraderie, glow coins add functionality and fun—perfect for night events or anyone wanting their coin to stand out. They spark conversations at collector meetups, making them a unique showcase piece.
Behind the Glow: How Glow Challenge Coins Are Made (Step-by-Step)
A common question: “How do they make them glow?” It’s not magic, but a detailed process blending traditional coin-making with modern luminous tech. I visited a challenge coin factory and saw it firsthand—here’s a step-by-step breakdown from design to finished product:
Step 1: Design Finalization
The process starts with design. Clients (military, corporations, collectors) work with designers to map out glow areas—will the whole coin glow, or just a part? Simple, bold designs work best (too much detail muddles the glow). The final design becomes a 3D model for mold creation, with multiple reviews to ensure glow placement is perfect.
Once finalized, the design is converted to a 3D model for mold creation—a crucial step, as design mistakes will show in the final coin. The designer and client review the model repeatedly to perfect glow placement and overall details.
Step 2: Mold Creation
Next, a steel mold is carved from the 3D model to stamp metal blanks into coin shapes. Precision-engineered to capture every detail (engravings, edges, glow areas), mold creation takes several days—critical for consistency across a batch.
Watching the mold-making process was impressive—machines carve with extreme precision, down to tiny details. The mold is polished to ensure a smooth coin surface, helping the glow material adhere better later.
Step 3: Metal Stamping
With the mold ready, metal blanks (brass, zinc, or copper) are fed into a stamping machine, which uses up to 100 tons of pressure to transfer the mold’s details to the coin. This ensures every engraving and edge is crisp.
After stamping, coins are trimmed and deburred to remove sharp edges—key for safety and quality. Rough edges are a sign of cutting corners, which I’ve noticed in poorly made coins.
Step 4: Applying the Glow Material
Now the fun part: glow material. Factories use high-quality, non-toxic strontium aluminate phosphorescent powder mixed with clear resin, applied by hand or precision tool to glow areas.
Even application is key—too thick covers details, too thin makes glow dim. Workers carefully fill design recesses without overflow, then cure coins in an oven to harden the resin and bond it to the metal. Proper curing (a few hours) ensures durability; poor curing leads to chipping or peeling.
Step 5: Finishing Touches
After curing, coins get finishing touches: polishing to enhance metal shine and smooth glow material, then optional plating (gold, silver, black nickel) for appearance and tarnish protection—critical for collectors.
Finally, each coin is quality-checked: glow brightness, design clarity, and no defects. Subpar coins are discarded—why high-quality glow coins are worth the investment. Cheap coins have uneven glow or fade fast, but well-inspected ones shine for years.
Choosing the Right Glow Challenge Coin: What to Look For
If you’re buying a glow challenge coin, here’s what to look for to ensure quality. I’ve made mistakes with dim, short-lived coins—this checklist helps avoid that:
1. Glow Brightness and Duration
The most important factor is glow: it should charge in 10–15 minutes (natural/artificial light) and shine bright for 8–12 hours. High-quality coins use strontium aluminate; avoid cheap phosphorescent powder that fades in hours.
I test every coin: charge 15 minutes under a lamp, then check after 6 hours. If it’s still bright, it’s a keeper; if it fades in an hour, it goes to my “meh” pile.
2. Material Quality
Choose coins made of brass, zinc, or copper—durable and resistant to wear. Avoid cheap aluminum (bends/tarnishes easily). Glow material should be smooth, even, and firmly bonded (no chipping/peeling).
Weight matters too—high-quality coins feel substantial (30–50 grams, depending on size), not flimsy.
3. Design and Detailing
Design should be crisp: deep, sharp engravings, and precise glow application. Blurry engravings or uneven glow mean poor manufacturing.
For custom coins, ensure the designer maps glow areas to enhance (not overpower) the design—e.g., a company logo filled with glow material to stand out at night.
4. Finish and Plating
Finishes (gold, silver, antiqued) should be even and smooth, with no scratches. Good plating protects against tarnishing, keeping coins looking new.
I love antiqued finishes—their vintage look pairs perfectly with modern glow. Choose a finish that fits your style or the coin’s purpose.
Caring for Your Glow Challenge Coin: Keep It Shining Bright
A high-quality glow coin can last decades with proper care. The glow material is durable but needs gentle handling—here’s how to keep it shining:
1. Charge the Glow Regularly
Charge the glow regularly: 10–15 minutes of natural/artificial light gives 8–12 hours of glow. I keep my coins on a windowsill so they’re always ready to shine at night.
2. Avoid Scratching the Glow Material
Glow material is softer than metal—avoid dropping or rubbing against rough surfaces. Carry it in a soft pouch (I use a velvet one) to protect it from keys or other pocket items.
3. Clean It Gently
Clean gently with a soft, damp cloth—no harsh chemicals, abrasives, or ultrasonic cleaners (they damage glow material and plating). Use warm water and mild soap, then dry thoroughly to avoid water spots.
4. Store It Properly
Store in a cool, dry place—avoid long-term direct sunlight (fades glow) or humidity (tarnishes metal). A display case or velvet pouch works best, not too tight to avoid pressing the glow material.
Glow Challenge Coins for Every Occasion: Ideas to Inspire You
Glow challenge coins aren’t just for collectors—they’re perfect for many occasions. Here are my favorite ways to use them:
Military and First Responders
Ideal for military units and first responders: perfect for night patrols, deployment souvenirs, or recognition. A military unit’s glow coin with their insignia lets soldiers carry a reminder in low light; first responders use them to honor bravery. I’ve seen a fire department’s glow badge coin—powerful during night shifts.
Corporate Events and Employee Recognition
Businesses love them for employee recognition, team building, or events. A company logo glow coin makes a memorable milestone or conference souvenir—more fun than standard corporate gifts. I helped a tech company give them post-product launch; employees still talk about it.
Events and Celebrations
Great for marathons, music festivals, weddings, or birthdays—guests keep them as souvenirs. A wedding coin with the couple’s names and date glows as a reminder; marathon finishers get an extra sense of pride. My music festival glow coin brings back memories every time it shines.
Collecting and Gifting
For collectors, they’re a unique addition—their glow makes them fun to display (I have a dedicated shelf). They’re also thoughtful gifts for fellow collectors, veterans, or anyone who loves unique memorabilia—showing you put in extra effort.
Why Glow Challenge Coins Are Worth the Hype
After years of collecting, I’m confident glow challenge coins are more than a trend—they’re timeless, symbolic of pride and camaraderie, and a fun way to commemorate moments. I love their duality: beautiful in daylight, magical at night with a soft glow.
Whether you’re a veteran, corporate leader, event organizer, or memorabilia fan, a glow challenge coin stands the test of time. It’s not just a shelf piece—it tells a story, sparks joy, and glows long after the day ends. Hold one in the dark, and you’ll see why they’re beloved.