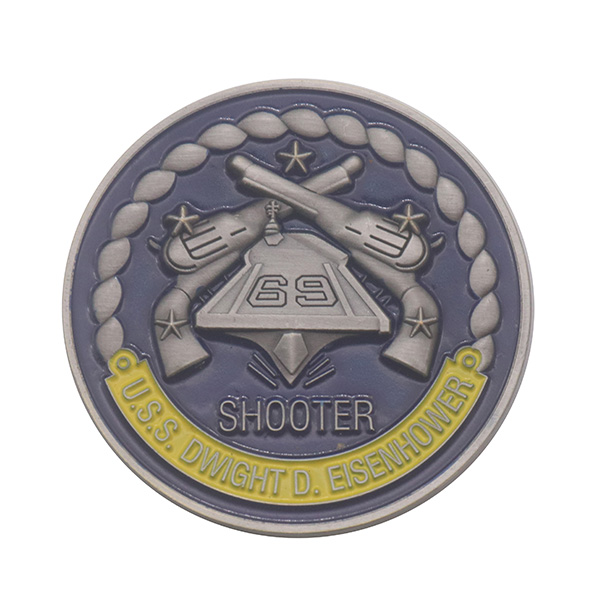
Creating Museum Magnetic Lapel Pins: The Complete Guide
Museum Magnetic Lapel Pins Design Phase
Concept Development
Brainstorm elements that represent your museum’s identity:
- Iconic architecture or gallery spaces
- Signature artworks or artifacts
- Museum logo or branding elements
- Special exhibition themes
Pro Tip: The best museum magnetic lapel pins capture the institution’s essence in simple, recognizable imagery.
Artwork Creation
Use professional tools to develop your pin design:
- Vector software: Adobe Illustrator (ideal for clean lines)
- Design specs: 300 DPI resolution minimum
- Key elements: Bold outlines, limited color areas
For magnetic lapel pins, ensure your design works at small sizes (typically 0.75″-1.5″).
Color Selection
Choose colors that represent your museum’s brand:
- Use Pantone colors for accurate matching
- Limit to 5-6 colors for best results
- Consider metallic finishes for highlights
2. Production Process for Museum Magnetic Pins
The manufacturing of your custom pins involves:
- Die-striking: Creating the metal base shape
- Enamel filling: Adding colored resins
- Polishing: Smoothing the surface
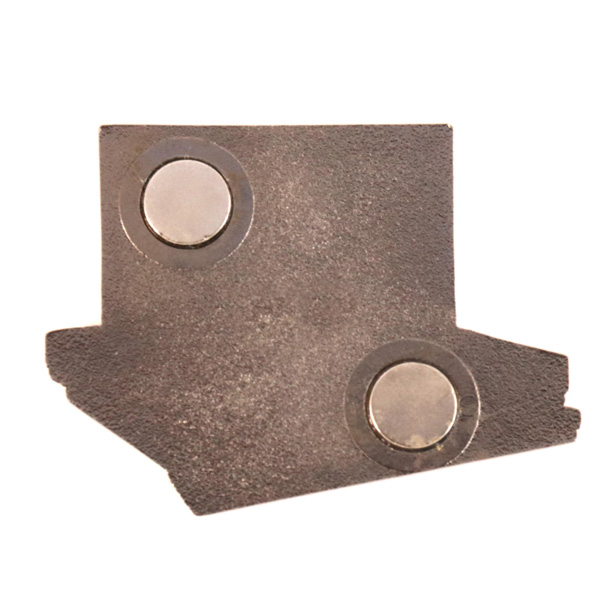
- Magnetic attachment: Securing neodymium magnets
- Quality control: Checking each pin
3. Why Choose Magnetic Backing?
Magnetic lapel pins offer unique advantages for museums:
- No damage to delicate fabrics or vintage clothing
- Secure hold without sharp pins
- Reusable and interchangeable
- Safer for children and elderly visitors